I'm taking a brief pause from my recapping to show you how I DIYed my shoes!
| 
|
I've always been a lover of shoes, but as you already know about me, I'm also a lover of a bargain. I didn't really want to spend a ton of dough on shoes that would barely be seen, other than a handful of photographs.
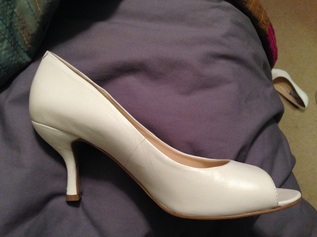
I had purchased very comfy white leather Nine West peep-toe pumps that were on sale at DSW almost a year before the wedding - I think they were $35. I figured I'd do something to them, but wasn't sure what. "Strassing" - aka bedazzling! - them seemed like a fun project, but the more I read about it, the more it seemed like a very long and expensive project.
Don't mind the odd picture.
But I was enamored with the idea. One of my House Party gals travels the world and designs dance costumes for a living (so she basically adds sparkle to things professionally!) came up with a few ideas. I knew I liked the idea of ombre, and I liked the idea of either doing blue (as my something blue) or pink/purple (in our wedding colors.) House Party J made these digital mock-ups:
Obviously, a little Mickey was also intriguing to me :)
I loved all these ideas, but was really worried about time - it was mid-April when I really started thing about this, and my to-do list was quickly becoming out of control. And what would happen if I started, but didn't finish? The shoes would look silly, and I'd probably just end up having to purchase something else.
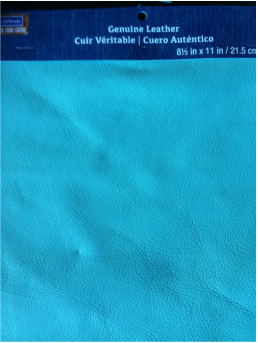
Time was getting away from me, and suddenly it was June. That's when I got the idea to just do the heel, but even that didn't seem like quite enough visual interest. I liked the idea of a little bow, but that would mean tracking down a little bow to glue onto the shoe! I measured the shoe, figured out what size I would need, and started looking, mostly on Etsy...and I couldn't find anything. I basically needed a simple blue leather bow, but nothing was quite right.
Then, on one of my bi-weekly trips to Michael's, I saw this:
I loved all these ideas, but was really worried about time - it was mid-April when I really started thing about this, and my to-do list was quickly becoming out of control. And what would happen if I started, but didn't finish? The shoes would look silly, and I'd probably just end up having to purchase something else.
Time was getting away from me, and suddenly it was June. That's when I got the idea to just do the heel, but even that didn't seem like quite enough visual interest. I liked the idea of a little bow, but that would mean tracking down a little bow to glue onto the shoe! I measured the shoe, figured out what size I would need, and started looking, mostly on Etsy...and I couldn't find anything. I basically needed a simple blue leather bow, but nothing was quite right.
Then, on one of my bi-weekly trips to Michael's, I saw this:
(You can find one like it here.)
It was only $7.99, and I had a 40% off coupon. I hadn't really thought about making my own bow because I didn't think I had the skills - but for $5, I figured it was worth a try.
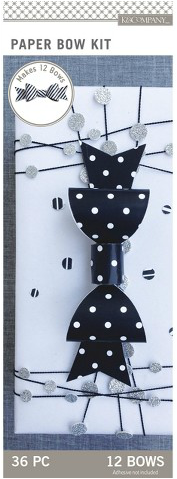
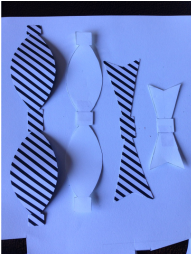
I got home, and looked for a bow pattern online, and once again, nothing I was finding was quite right. Then it occurred to me - I had purchased these little pop-out paper bows from Target:
I got home, and looked for a bow pattern online, and once again, nothing I was finding was quite right. Then it occurred to me - I had purchased these little pop-out paper bows from Target:
| 
This is what they look like before you put them together.
|
(You can find them here)
When I had purchased them, I wasn't sure what I would use them for, but they seemed handy. Turns out - they are the PERFECT stencil/template to make my own bows!
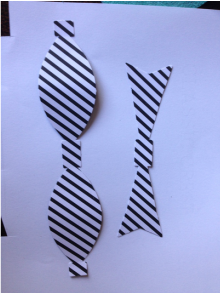
Now, they weren't the exact shape and size I needed, so they needed some adjusting. But they gave me a place to start from:
Now, they weren't the exact shape and size I needed, so they needed some adjusting. But they gave me a place to start from:
Slightly too large.
| 
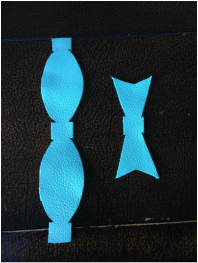
Made my own pattern using a similar layout.
|
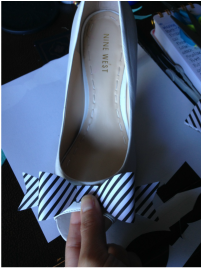
Then I cut them out of the leather I bought from Michael's:
| 
|
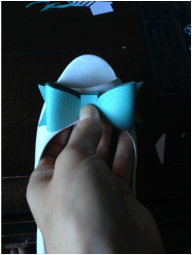
And glued them on, using E6000 craft glue:
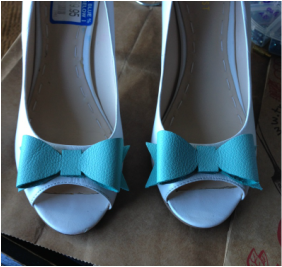
And my bows were done! I couldn't believe how easy it was - I think it took me about 45 minutes, tops.
Now...on to the sparkle.
I knew that purchasing genuine Swarovski crystals would be very expensive - even just doing the bows and heels, could easily cost me a few hundred dollars! That defeated the purpose of keeping this relatively low-cost. So I nixed genuine crystals, did my research, and ended up purchasing:
This probably sounds like a ton of stones - yes and no. All of these stones fit in about half of a quart-sized ziplock! I think I used about a third to a half of them, overall. But I couldn't really buy less - for one, I started the project a month out from my wedding, and couldn't risk running out and having to order more - and secondly, you can't really buy them in smaller quantities (again - unless you're buying the real ones!) I definitely wanted a variety of sizes, because I think that's the key to making it look good. Some of the ones I was seeing online used all the same sized stone, and it comes off as cheaper looking, I think.
I purchased the Swarovski Hotfix Crystal Tool (again - 40% off coupon at Michael's - about $13)
Now...on to the sparkle.
I knew that purchasing genuine Swarovski crystals would be very expensive - even just doing the bows and heels, could easily cost me a few hundred dollars! That defeated the purpose of keeping this relatively low-cost. So I nixed genuine crystals, did my research, and ended up purchasing:
- 1,440 pieces of SS6 (that's the size...2 millimeters) in aquamarine stones for $2.97
- 1,440 pieces of SS6 in crystal AB (that stands for Aurora Borealis - so it's not a plain 'white', but has an iridescent sheen to it) for $3.99.
- 1,440 pieces of SS10 (3mm) in aquamarine for $4.59
- 1,440 pieces of SS10 (3mm) in crystal AB for $4.59
- 1,440 pieces of SS16 (4mm) in aquamarine for $6.59
- 1,440 pieces of SS16 (4mm) in crystal AB for $6.59
- 1,440 pieces of SS20 (5mm) in crystal AB for $9.99
- 1,440 pieces of SS10 (3mm) in Aqua AB (so the color is in between the crystal and aquamarine) for $10.07
This probably sounds like a ton of stones - yes and no. All of these stones fit in about half of a quart-sized ziplock! I think I used about a third to a half of them, overall. But I couldn't really buy less - for one, I started the project a month out from my wedding, and couldn't risk running out and having to order more - and secondly, you can't really buy them in smaller quantities (again - unless you're buying the real ones!) I definitely wanted a variety of sizes, because I think that's the key to making it look good. Some of the ones I was seeing online used all the same sized stone, and it comes off as cheaper looking, I think.
I purchased the Swarovski Hotfix Crystal Tool (again - 40% off coupon at Michael's - about $13)
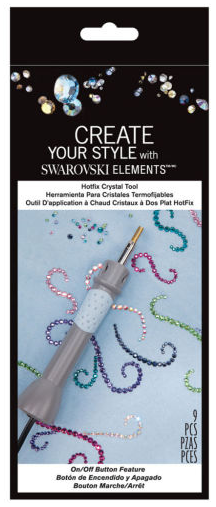
(available here)
...and I got to work!
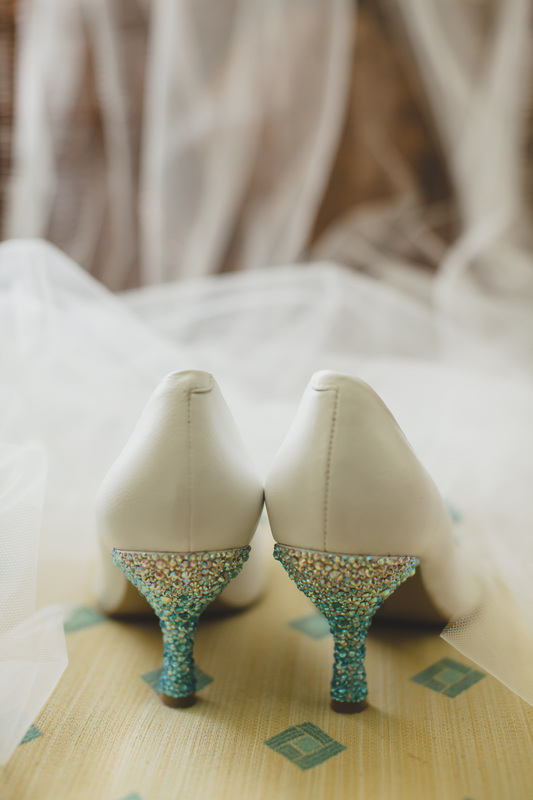
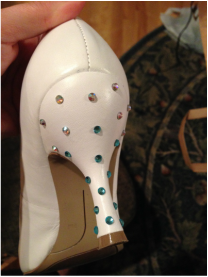
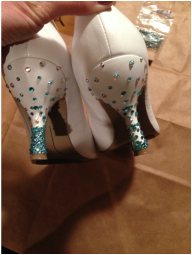
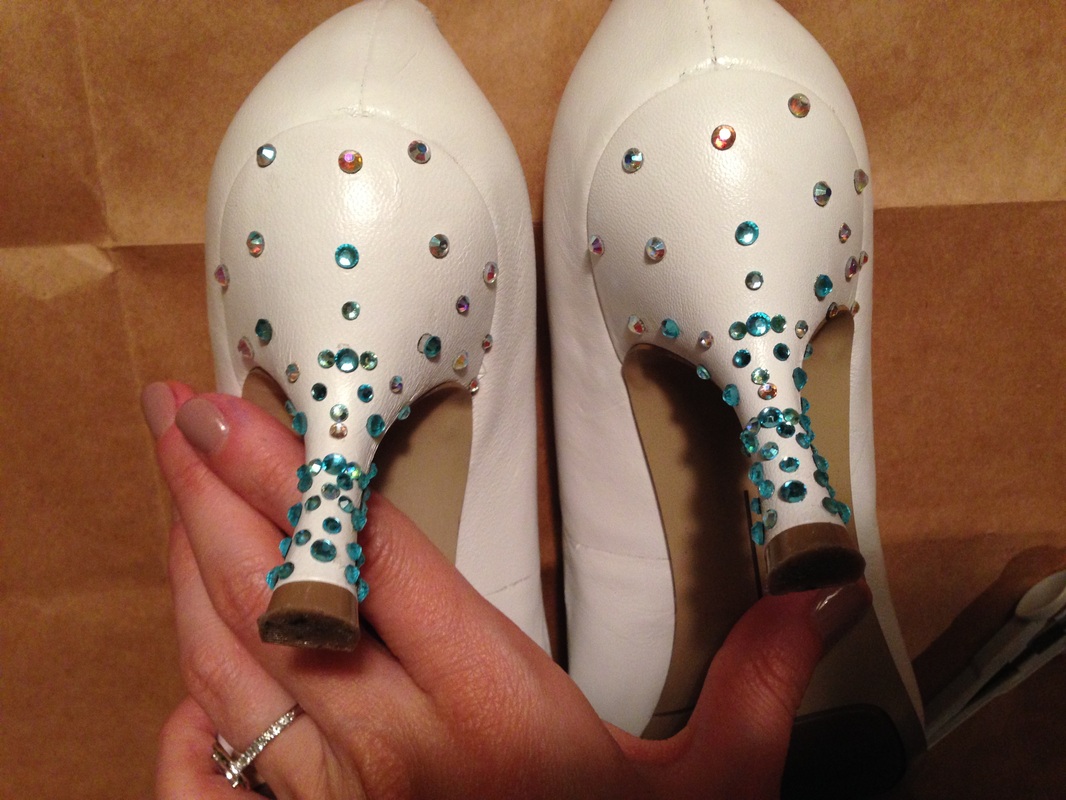
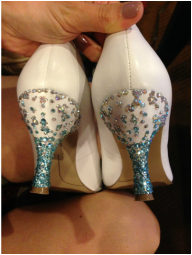
After watching/reading a bunch of online tutorials, I started by applying the bigger stones in a scattered pattern, with the darker blue toward the bottom of the heel, and the crystal AB toward the top. As I went along, I started filling in the space with progressively smaller stones:
After watching/reading a bunch of online tutorials, I started by applying the bigger stones in a scattered pattern, with the darker blue toward the bottom of the heel, and the crystal AB toward the top. As I went along, I started filling in the space with progressively smaller stones:
| 
|
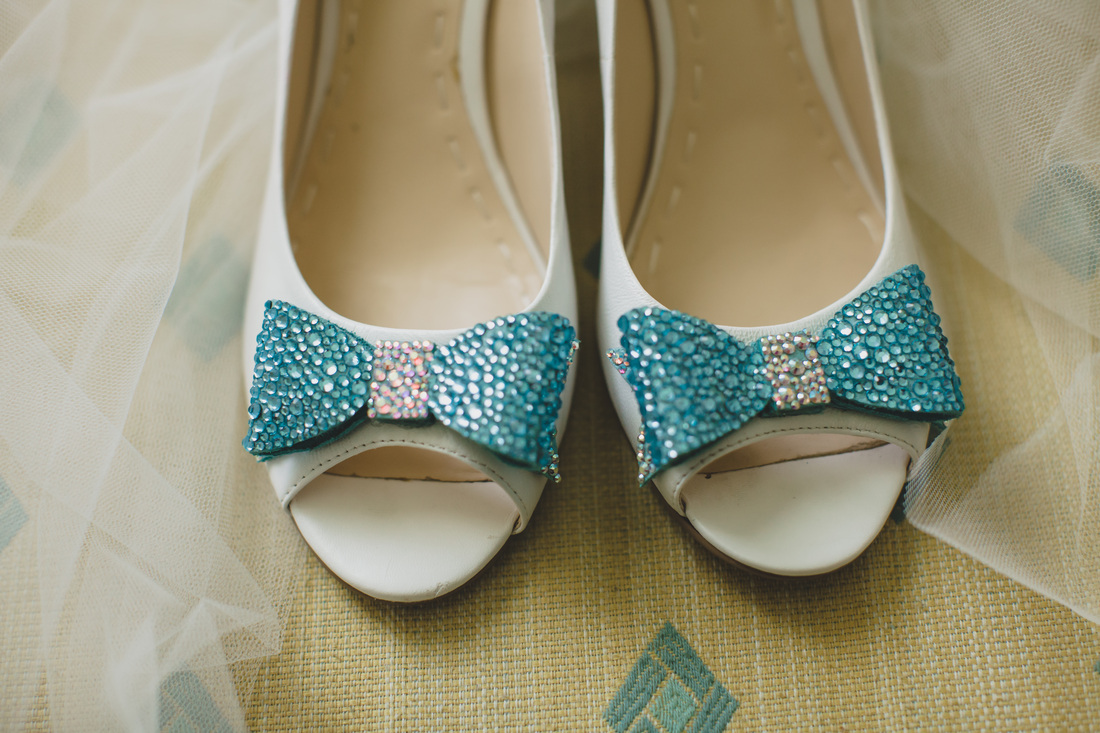
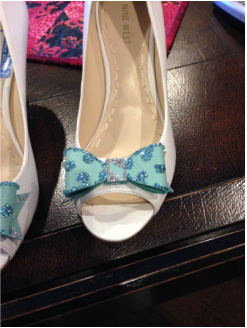
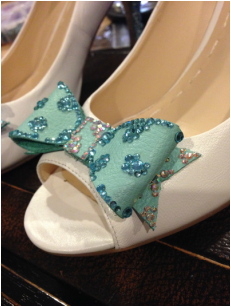
And then I did the same thing with the bows, but with only the blue color, and the crystal in the center:
| 
|
It took...so...long. I knew it was going to, but...wow. I basically spent 3 weeks either strassing my shoes or working on my ornament favors, while watching a whole lot of Netflix. (Thank goodness for the schedule of a teacher - the 6 weeks off before our wedding saved me!)
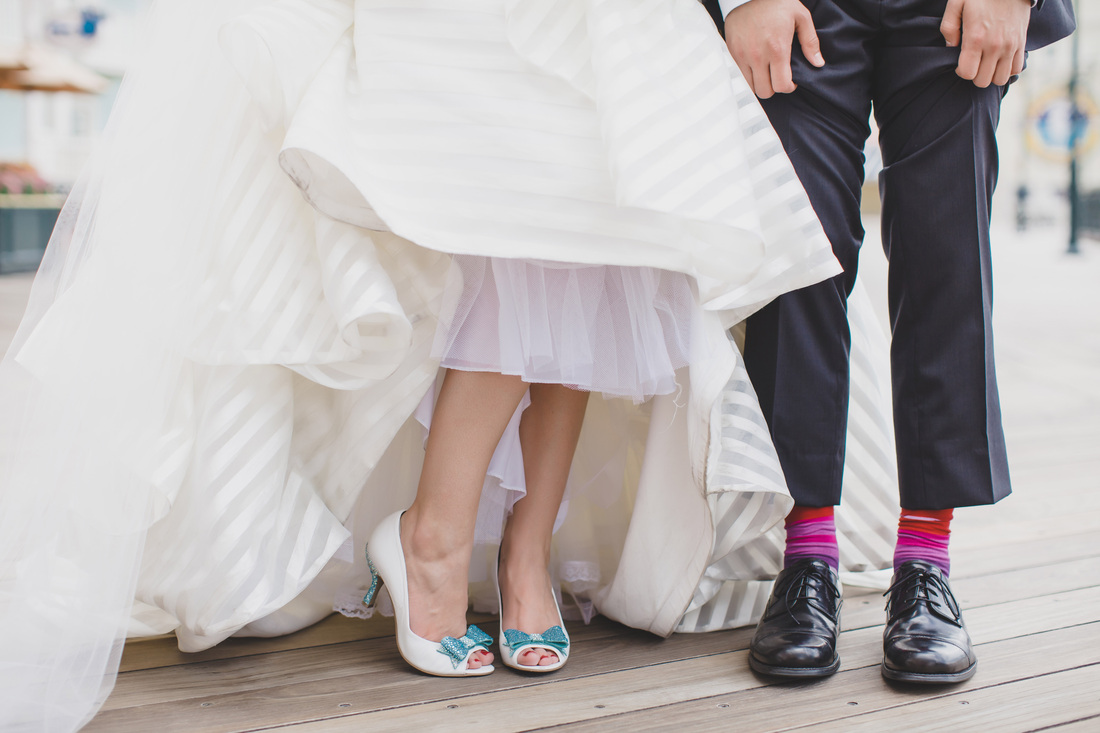
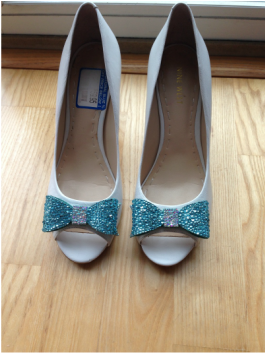
While I wouldn't recommend this for everyone, I absolutely loved this project! I like being crafty, and I don't often get to do it. It was very "zen," and sort of mindless once I got going. The result was, frankly, better than I expected - and they are such a great souvenir of the wedding day (since my dress is long gone.)
While I wouldn't recommend this for everyone, I absolutely loved this project! I like being crafty, and I don't often get to do it. It was very "zen," and sort of mindless once I got going. The result was, frankly, better than I expected - and they are such a great souvenir of the wedding day (since my dress is long gone.)
| 
|
They aren't the most wearable shoes...the stones do fall off a little as the day goes on. I actually reapplied some stones before our second reception, but I think I only spent about 20 minutes on it.
In total, this project cost me about $100. I didn't strass the whole shoe, but since I had so much left over, it probably wouldn't have actually cost me that much more to do the whole shoe. So if you are someone debating the cost of strassing - don't be fooled! You don't have to spend as much as what most of the blogs/videos say. The Swarovski stones are super sparkly, but just aren't that different from the cheap stuff.
I think this was my first official DIY-post...hope it helps someone out there!

 RSS Feed